Scalloped edge skirt.
I drew around basic skirt block, marked Cf , darts and grainline. I closed the waistline dart and drew a line down to the hem, cut it and opened it, so the opening is 6cm wide on hemline. I drew the random line close to the closed dart, cut it and opened it, placed the paper underneath and secured it with the masking tape. So my skirt has a slight flare. To make the scalloped edge I 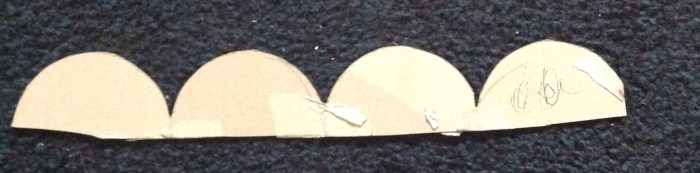 used a template which i made it myself from the cardboard using a glass and a pencil, I placed the half of the glass on the cardboard and drew around it four times, to make a row of the semi circles,so I drew in the semi circles and extended the sides so my circles fit, and I got a slight a- line skirt block.
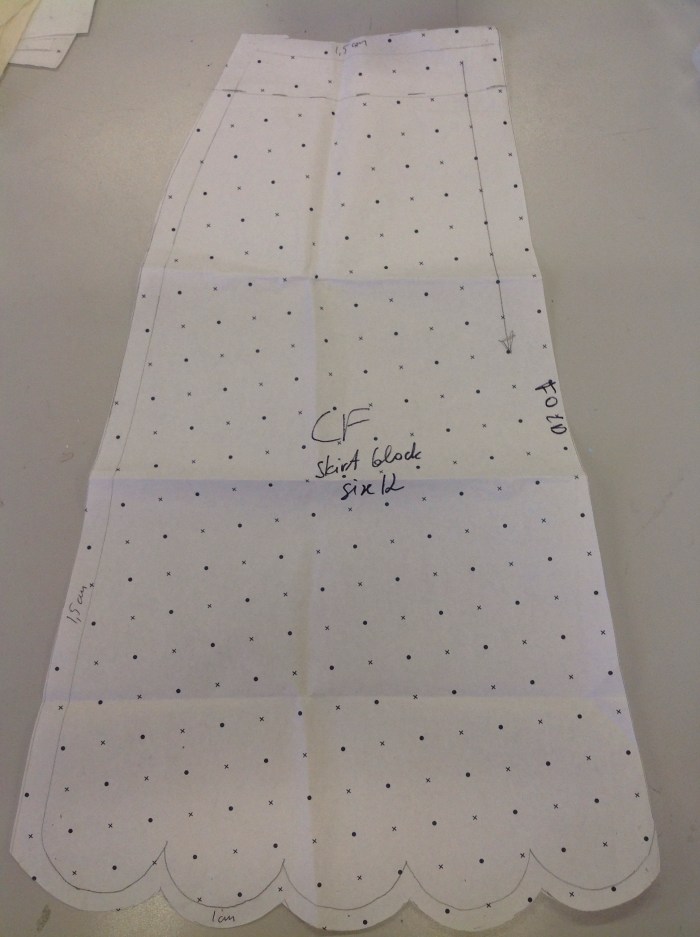
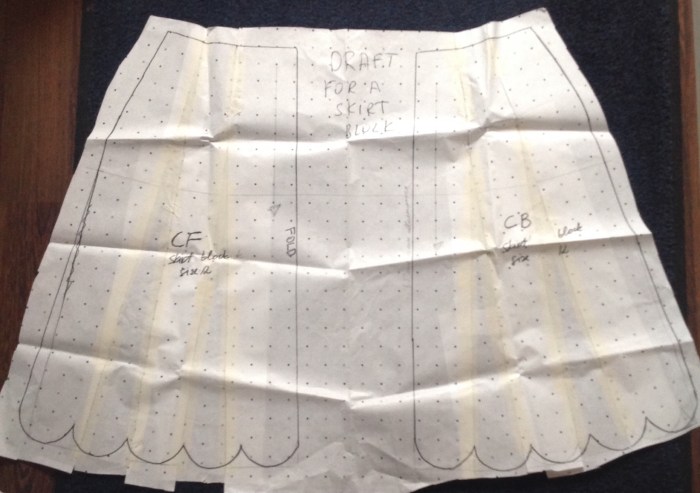 To make a new block I traced it a draft block on the new piece of the paper, added seam allowance 1.5cm on side seam and waistline, and 1cm on the scalloped edge.
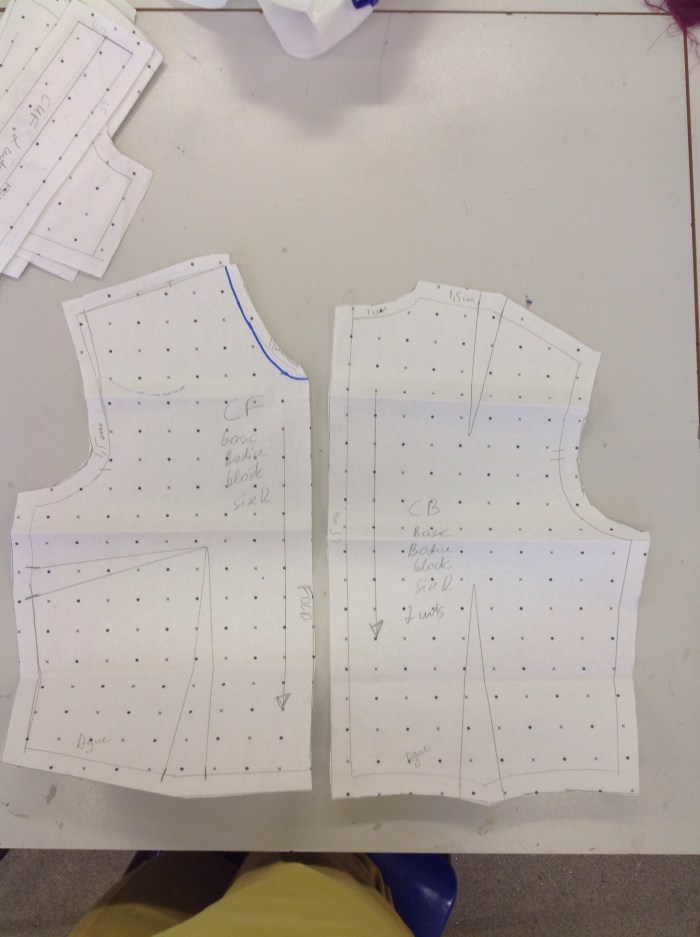
 On the Cb same method, just added 1,5 cm seam allowances on the both side seams.
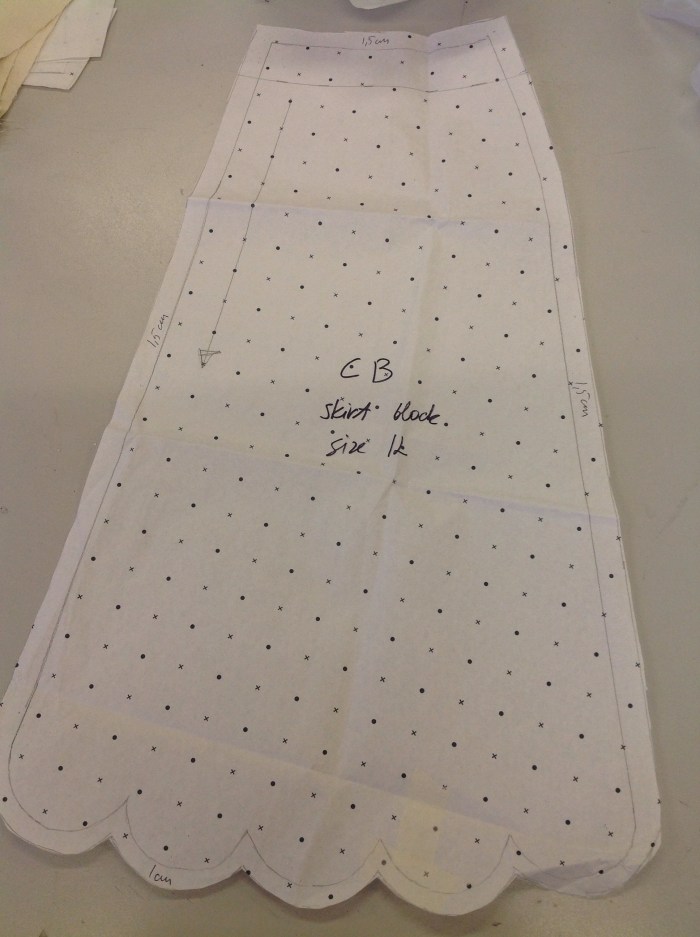 Waistband
On the Cf I decided what 5 cm deep it is enough for the waistband so i measured 5cm down from the waistline on the side seam and drew the line across the block making a waistband. And marked the folding line.
on the Cb is the same method . I drew 5 cm line to extend the band so I could sew


on the poppers.
To make more shaped bands I measured 1 cm on the sides of Cf and Cb and drew the angled line down.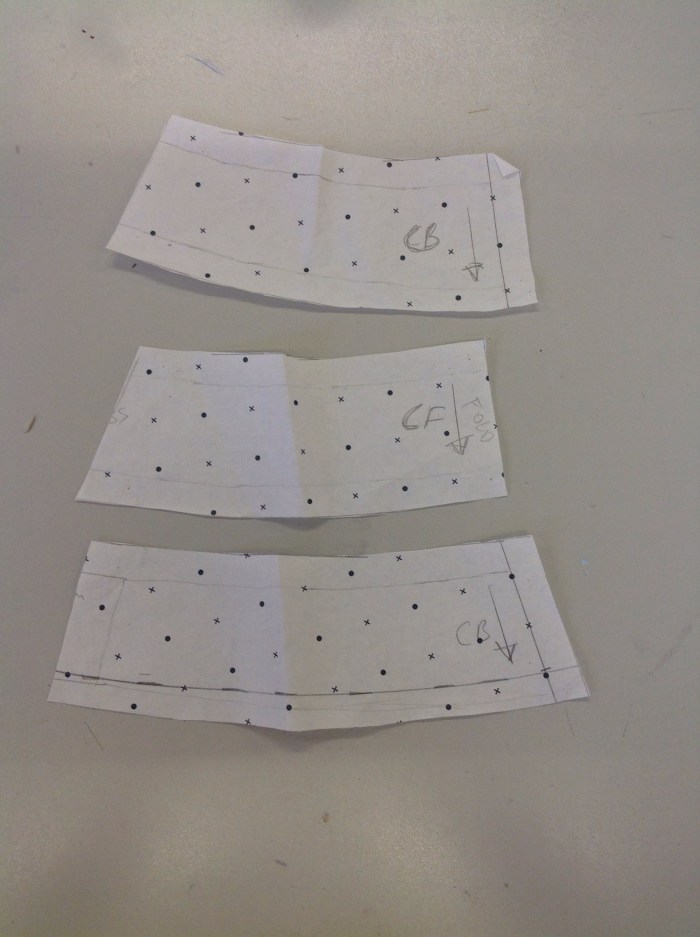


 Balloon sleeves
 To make a new block for the shoulder I traced it off on the new piece of the paper and added 1.5 cm seam allowance and cut it out.
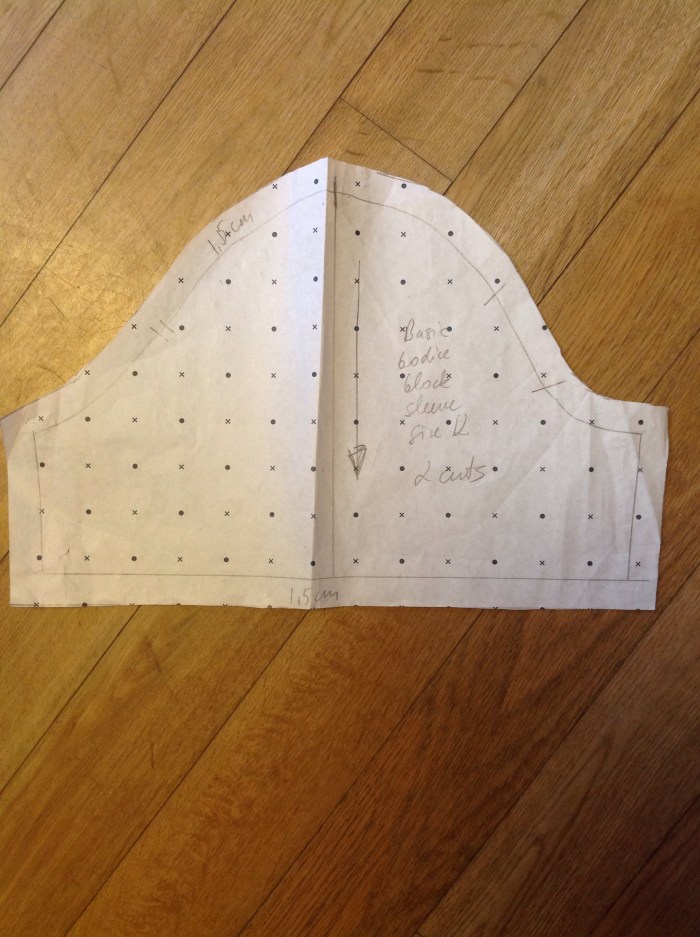 For the balloon sleeve I drew around the draft on the new piece of paper , I drew in 6 lines down from top to the hemline I cut them in, opened and placed the paper underneath and secured it with the masking tape, so each opening has a 4 cm
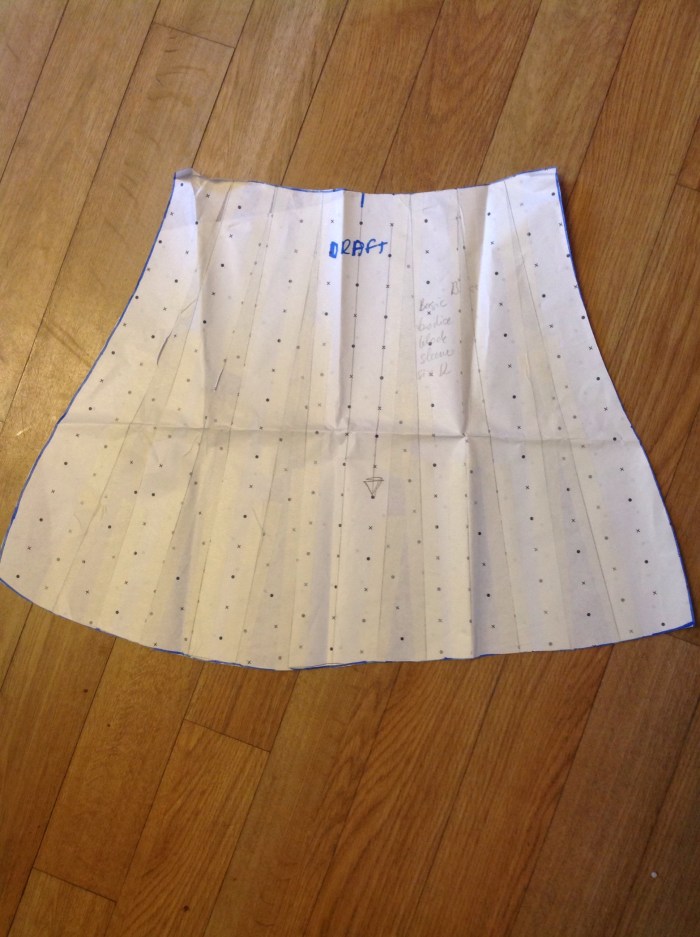 To make a new block I traced it off on the new piece of paper and added 1.5cm seam allowance on sides and 1cm on the top of the sleeve
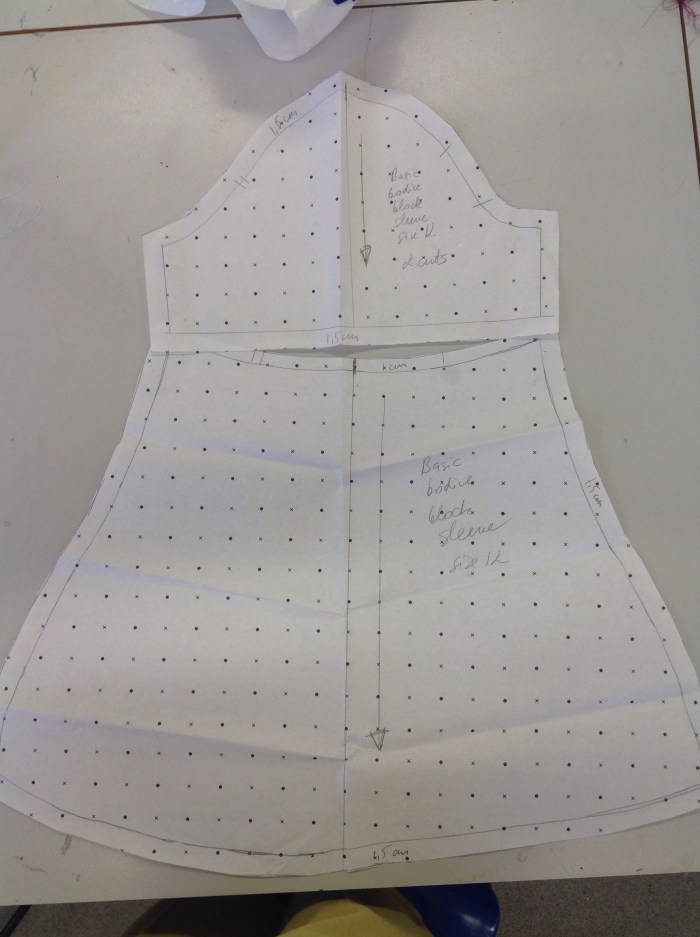 A cuff.
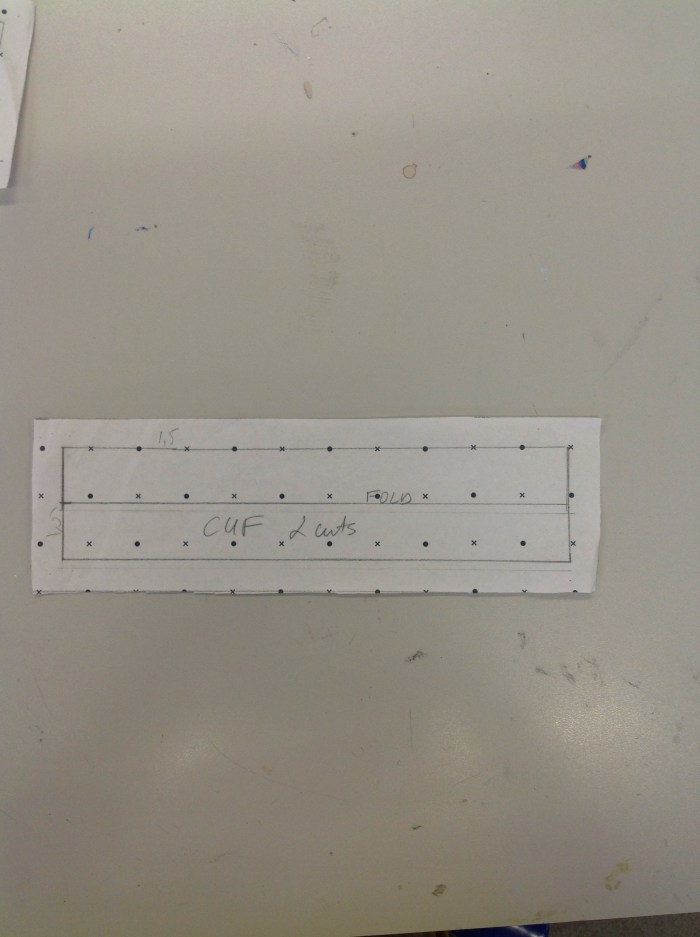
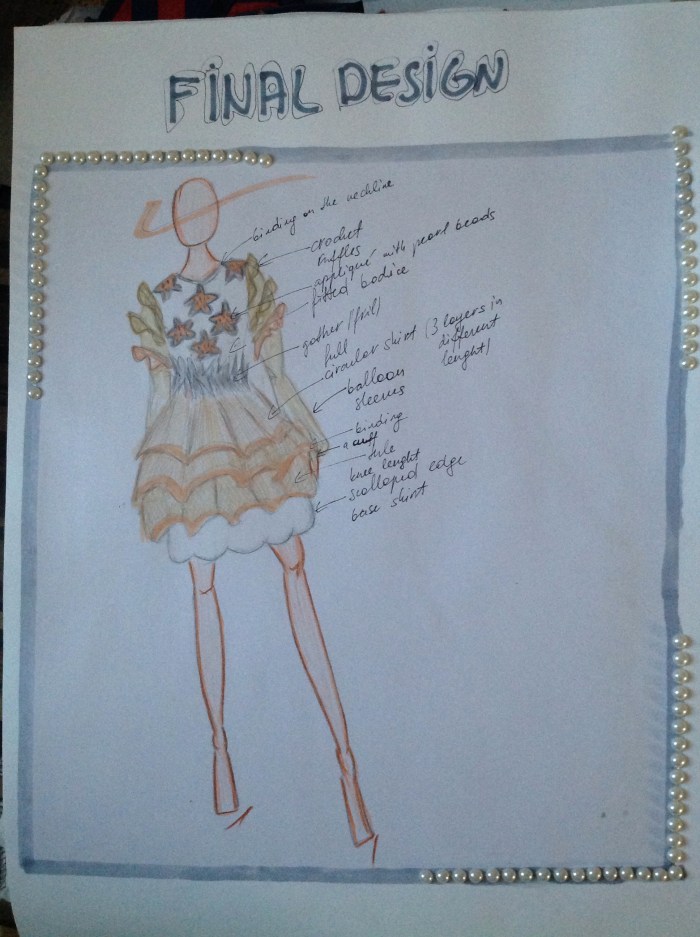 In my sketchbook I created the page for my Final design. I redrew the figure with a design and annotated.
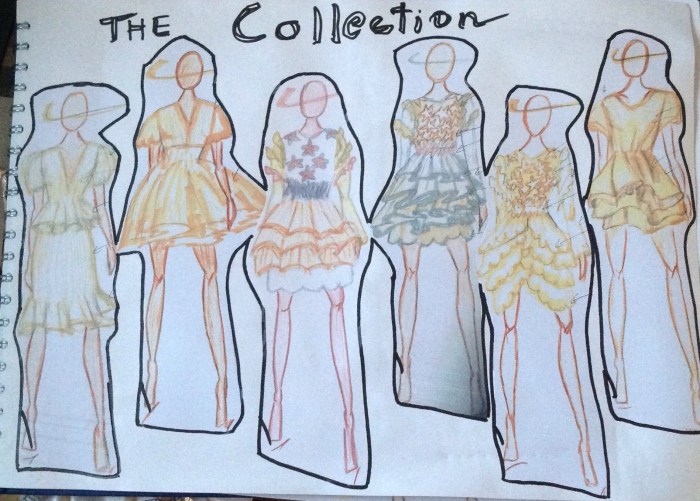 In my sketchbook I created the page with my chosen designs for the Collection.
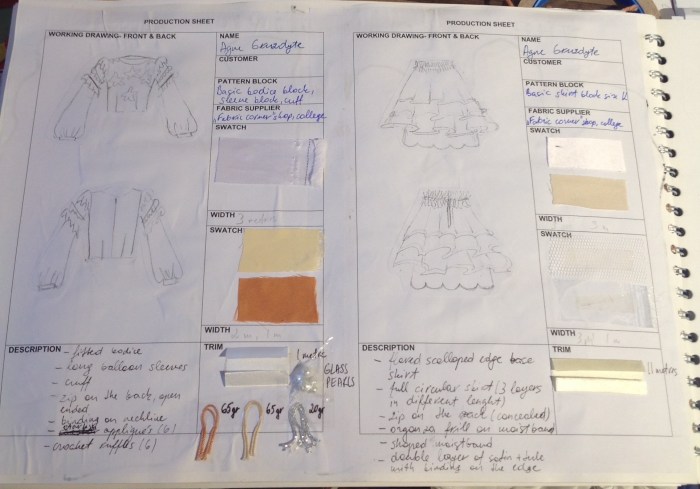 I drew in the design of the top and the skirt into my production sheet. I annotated and explained what kind of pattern blocks I used to create my own blocks. And explained what the garment contains.
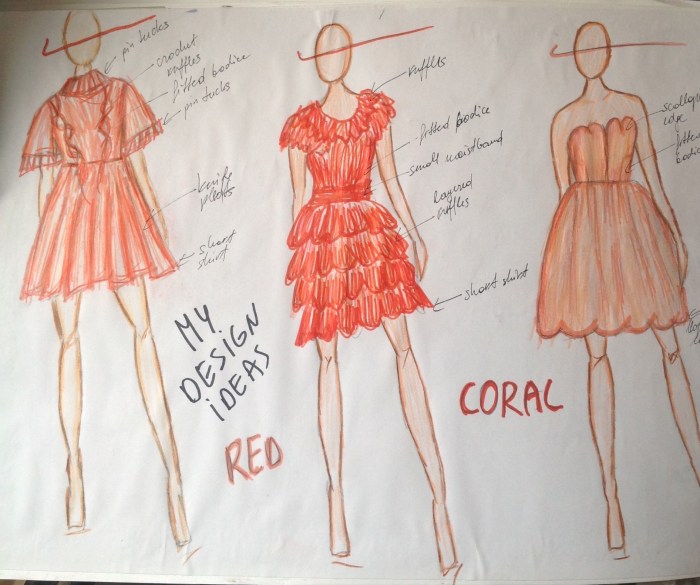 The colour palette of these designs represents a seastar coral colour. I annotated every design by writing on the right side of the sketchbook.
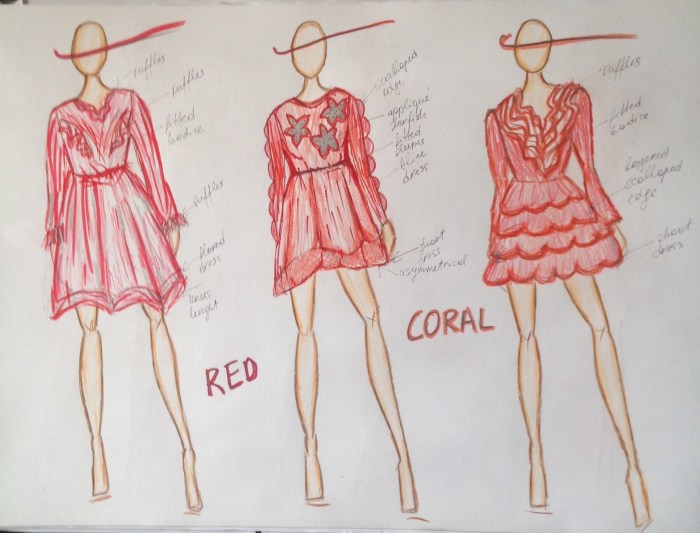 I really like the middle one with star appliqués and scalloped edged sleeves.
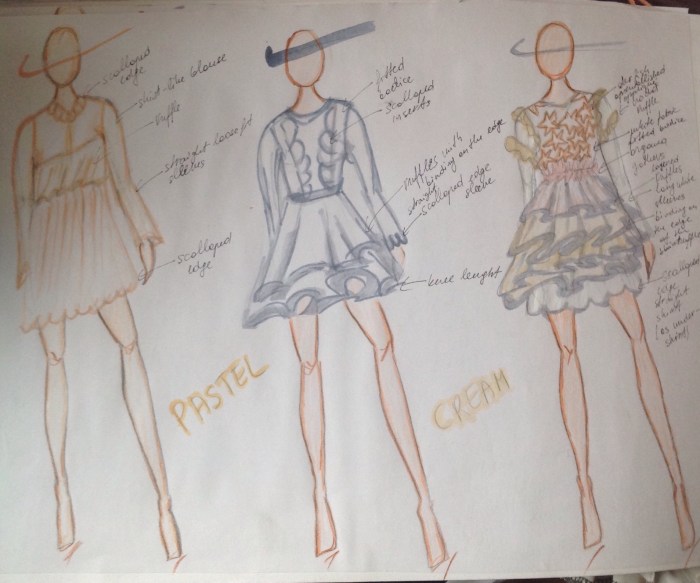 My favourite of this page is third of the designs, wich I developed and chose for my final one.
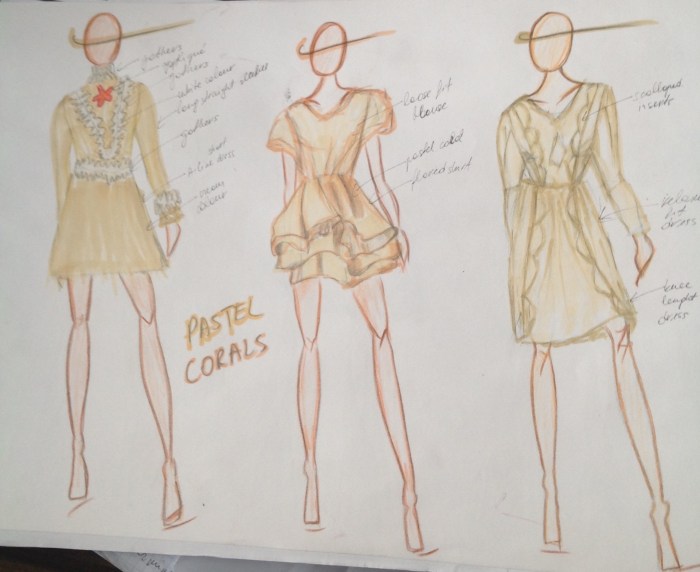 First and third of the designs are my favourite because they have more details.
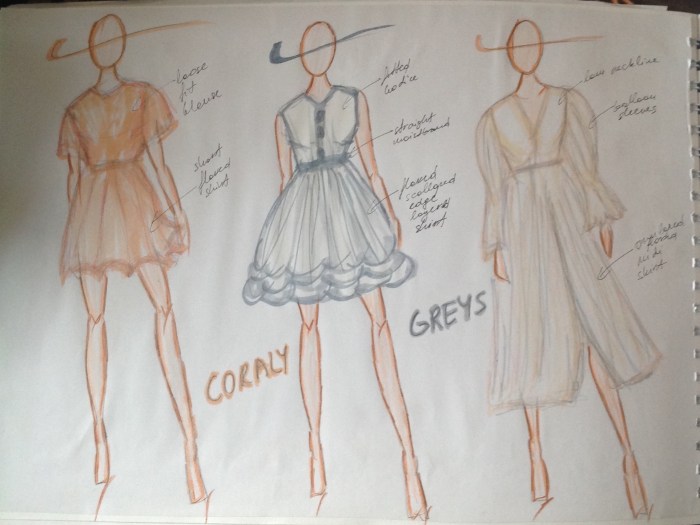 these three designs are very simple, if I had more time I would add more details on them.
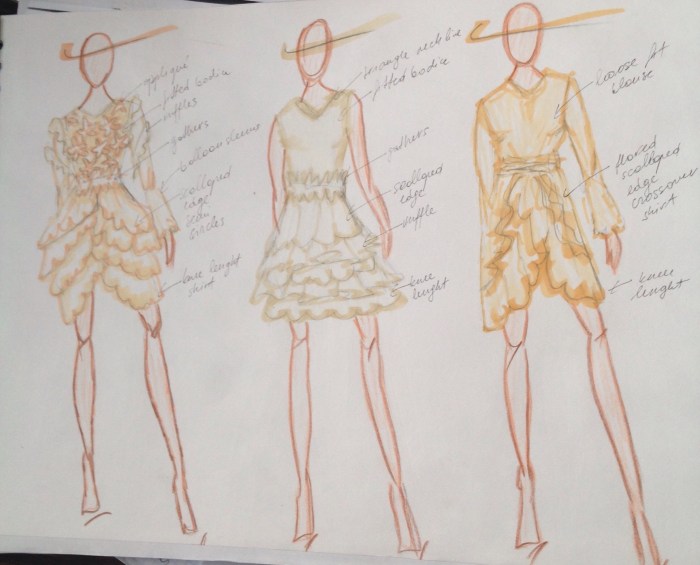 First design of these three are my favourite. It has loads of different details and surface decorations.
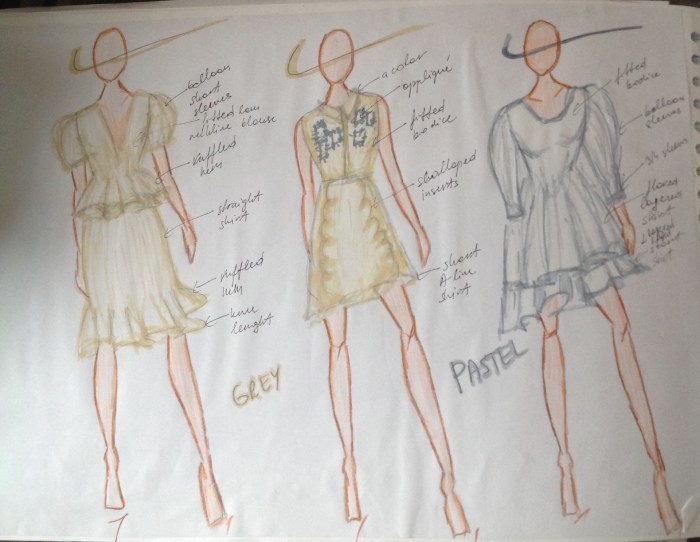 I really like first design with a ruffled hem and short ballon sleeves.
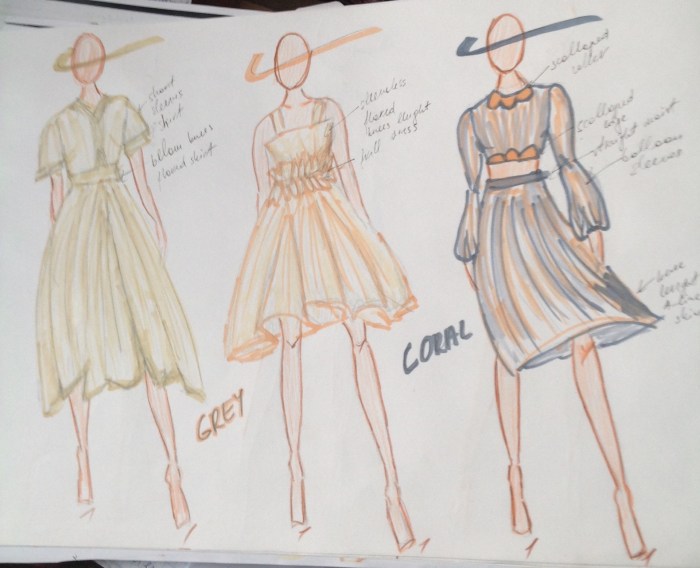 A little bit mixed colour fabric on the third design and scalloped inserts on the top.
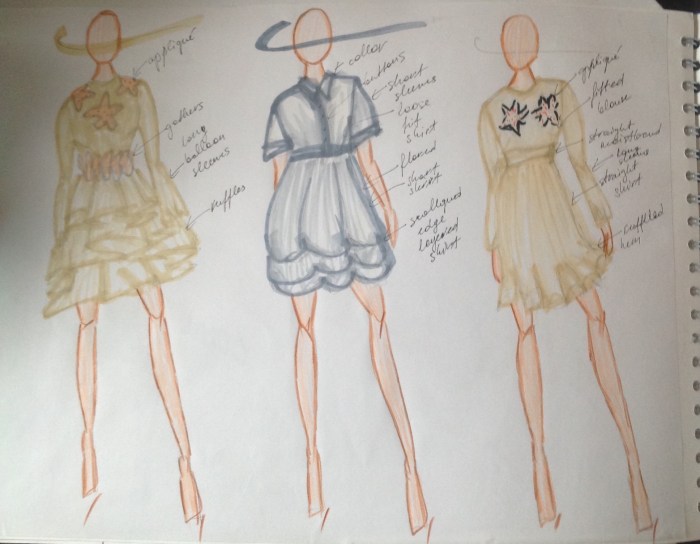 I like all of these three design ,it’s kinda developed mix of my previous designs.
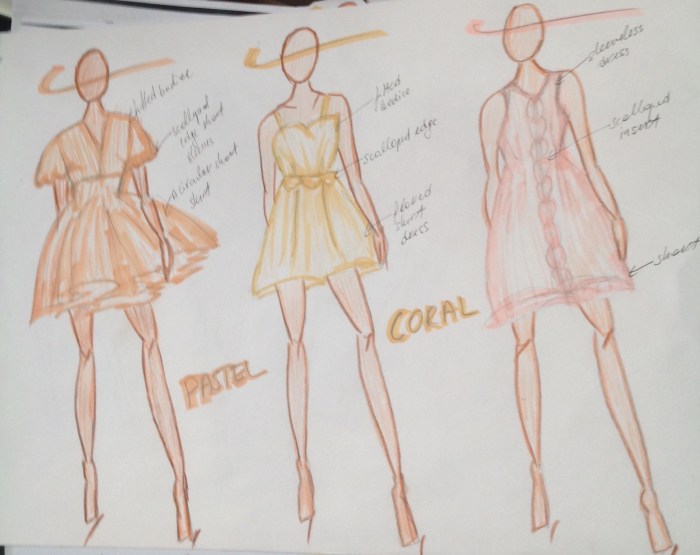 and here is my final three designs of all thirty. I really like first design with full skirt and scalloped hem short sleeves. I’m proud of my self by producing a thirty designs.
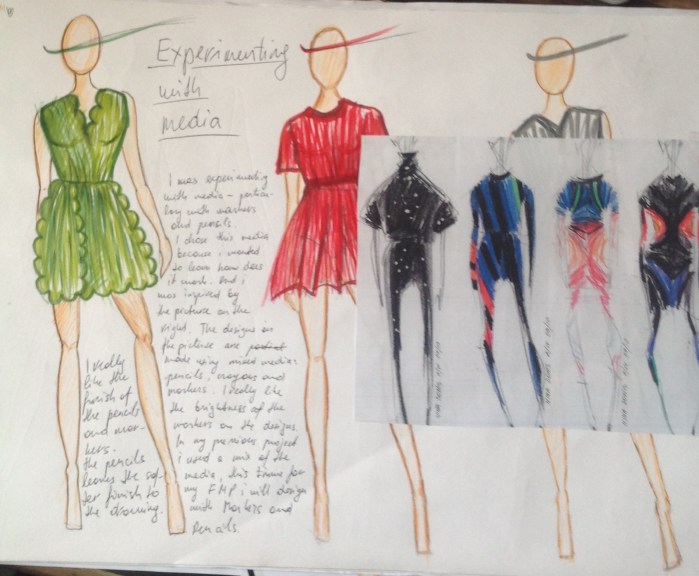 I came up with this idea after looking trough a book ” Fashion drawing” by Michele Wesen Bryant. I’v tryied it on the three fashion figures some designs with this chosen media and I was pleased with the outcome of the images.
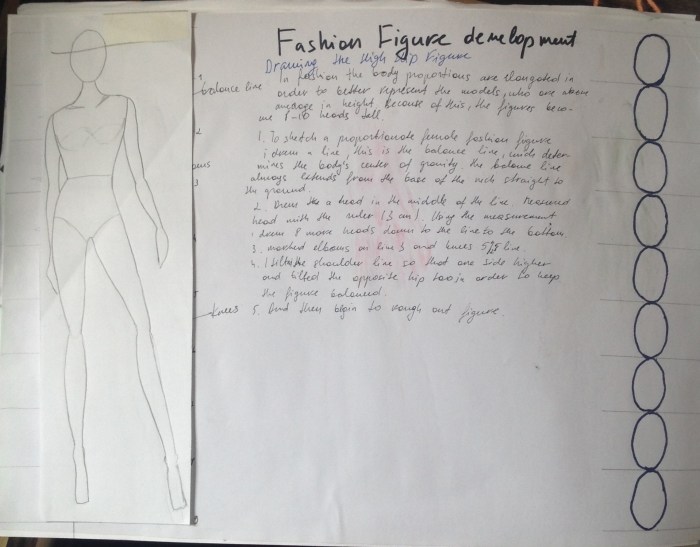 Then drawing a figure it is very important to get wright proportions. I think my drawing got improved since I started first year, because I I’m practising it more often. I believe that in future projects it will be more developed.
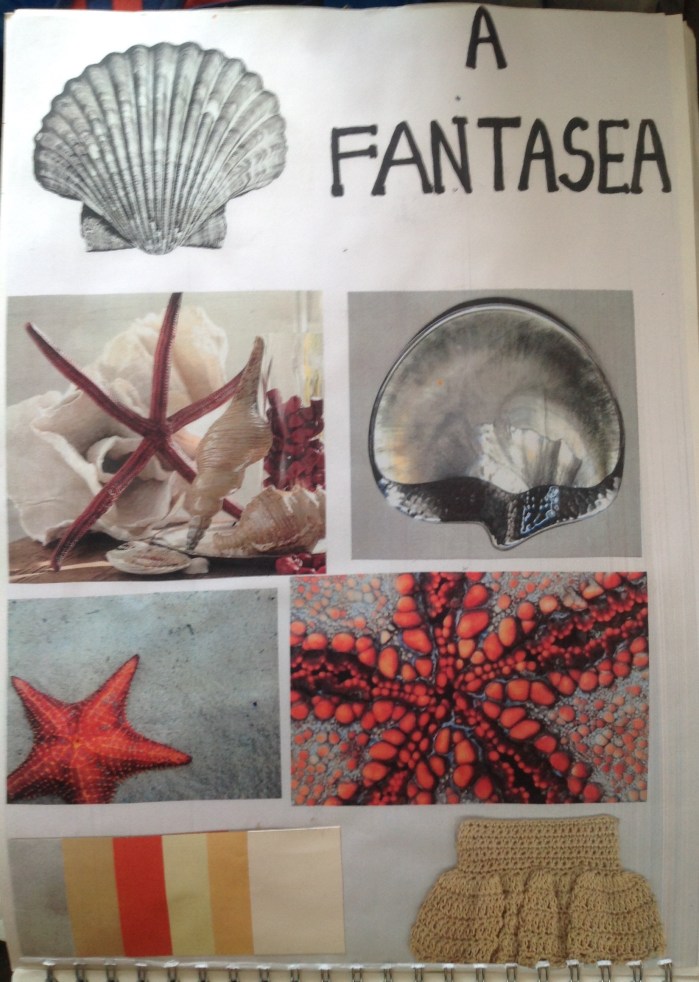 I named this Moodboard “A FANTASEA”. I believe when you creating something you always fantasising in a certain way. And at the end I put word Sea just because my inspirations came from the Sea.
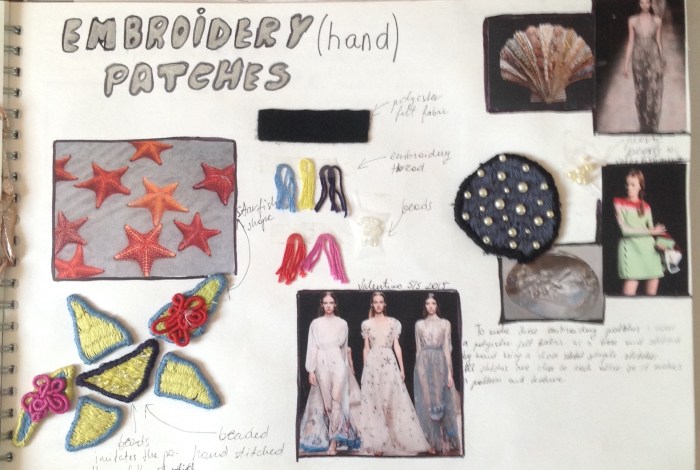
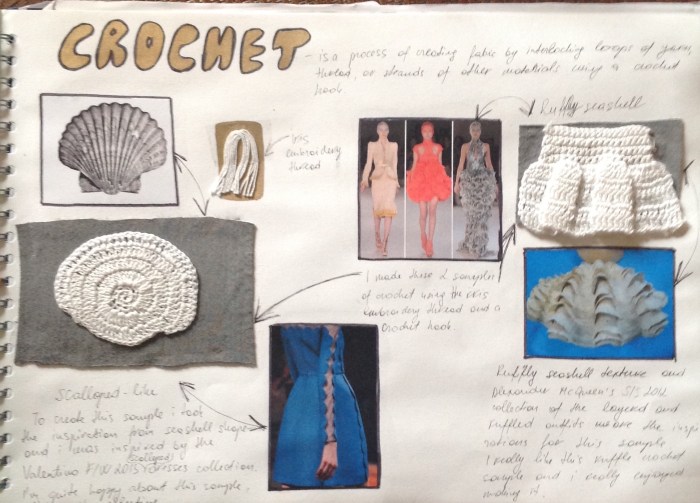 I learned to crochet when I was teenager, I mostly do just a simple patterns and stitches. I think it’s very enjoyable process of making something beautiful. I’m very pleased with the outcome of these samples and if I could have more time I would make more of them.
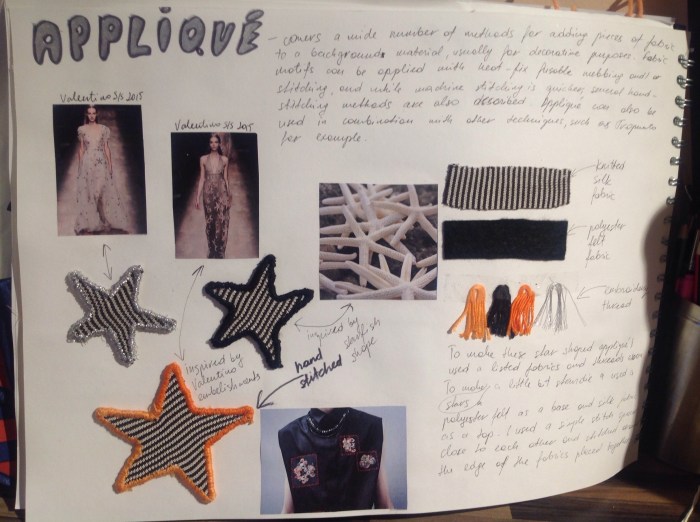 On my sketchbook page I explained what I used to make these appliqués, and linked to my theme and inspiration.